A go-kart clutch is an important mechanical component, as it engages the power transmission. It does this by transmitting the torque from the crankshaft of the engine to the rear axle, ultimately moving the go-kart forward.
Therefore, it’s important that a go-kart clutch is positioned on the crankshaft correctly and that it’s aligned parallel to the rear wheel sprocket of the axle. Additionally, it must also engage at an optimal rpm range to avoid excessive slippage.
When it comes to adjusting a go-kart clutch, there are two things you’ll need to account for, which are:
If your centrifugal clutch needs adjustment, follow the steps below. This guide will explain how to adjust the clutch position and also how and when to change the tensions springs inside the clutch.
Before we start, here are the tool you will need:
- 1 x Allen Key (for sets screws)
- 1 x Wrench (for crankshaft bolt)
1. Adjusting the Clutch Position on the Crankshaft
The go-kart clutch sprocket should always be parallel to the rear axle sprocket. A misalignment of both components may not only cause premature chain wear, but it can also hinder your clutch to efficiently transfer torque.
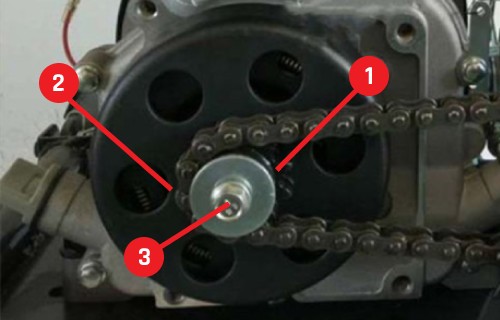
Go-Kart Clutch Setup
- Set Screw (Key)
- Set Screw (Crankshaft)
- Bolt (Crankshaft)
In order to avoid this, you’ll want to adjust the position of your clutch on the crankshaft so that it’s fully aligned with the rear axle sprocket. Here’s how you can do this in a few simple steps:
Step 1 – Loosen the Set Screws
Firstly, loosen the set screws of your clutch. These are located near the clutch sprocket, whereby one of the set screws is secured against the key, the other against the crankshaft.
To loosen them, turn the set screws counterclockwise with a fitting hex key. Don’t remove them, simply loosen them instead.
Step 2 – Loosen the Crankshaft Bolt
Now, loosen the bolt that runs perpendicularly to the clutch, into the crankshaft. Loosen it by turning it clockwise as well. You’re not required to remove it.
Step 3 – Reposition the Clutch
Now, adjust the position of the clutch by sliding it across the crankshaft until it’s fully aligned. You can do this while your chain remains attached to both sprockets. For more information, feel free to check out my guide on how to align go-kart sprockets correctly.
Step 4 – Tighten the Set Screws and Bolt
Once the clutch sprocket and the rear axle sprocket are fully aligned, it’s time to tighten the set screws and the crankshaft bolt. To tighten them simply use the appropriate key/wrench by turning them clockwise this time.
Ensure that all set screws, as well as the crankshaft bolt are tight. Now, all that’s left is to take your go-kart for a spin! Take note that you can also adjust the rear axle sprocket instead of the clutch, which may save you some time.
If you plan to adjust your go-kart clutch to engage at higher rpms or in case you are experiencing slippage, then read on.
2. Changing the Clutch Tensions Springs
The second method of adjusting your go-kart clutch is through changing the tension springs that are located inside the clutch itself. This process requires a little more time, as you’ll need to open the centrifugal clutch.
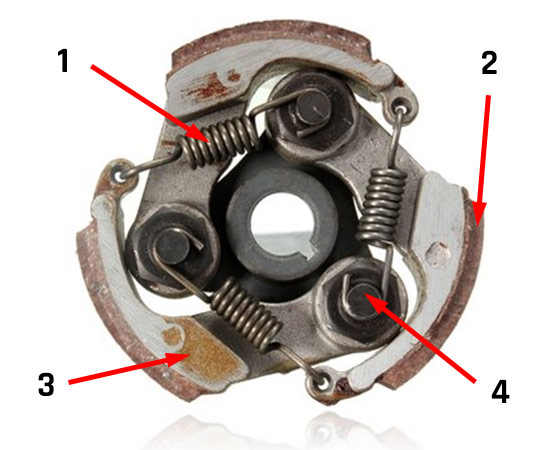
Go-Kart Clutch Description
- Tension Spring
- Friction Material
- Flyweight/Shoe
- Pivots
As you can see from the image above, these tension springs are connected to the flyweights, which release and press the friction material against the drum, when a certain rpm is reached.
Go-kart springs can wear out over time, meaning that your clutch will engage at lower rpms and can also cause your clutch to slip more often. Let’s take a closer look at how you can adjust the spring tension in 5 easy steps.
Step 1 – Remove Your Clutch
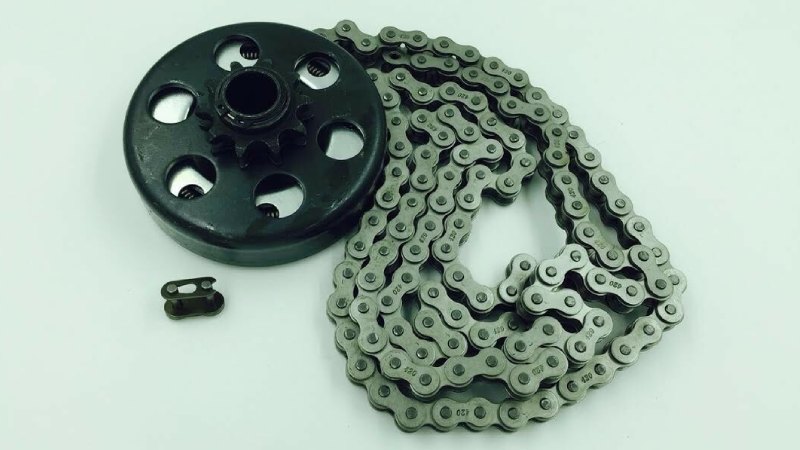
The first thing you’ll need to do is remove your clutch from the crankshaft. This requires you to remove your go-kart chain through the master link, taking off the bolt and washer from the crankshaft and loosening the adjustment screw on your clutch.
This allows you to remove your centrifugal clutch from the crankshaft. For now, don’t reconnect the roller chain and keep the crankshaft bolt and washer aside first.
Step 2 – Disassemble Your Clutch
Now, disassemble your go-kart clutch. Simply remove the snap ring that is located near the clutch sprocket and move the drum/housing. This will leave the inner components of the cutch exposed, which you will need to now access.
Step 3 – Modify or Replace The Tension Springs
There are three different spring configurations on centrifugal go-kart clutches: 1 spring, 2 springs or 3 springs.
- 1 Spring: Long spring connected on each end to form a circle
- 2 Springs: Two short springs connecting both flywheels
- 3 Springs: Three springs, each connecting a flywheel to a pivot
There are two ways to go about adjusting spring tension. The first way is by removing a few coils to increase the spring force. Simply remove parts of the spring coils with a pair of cutting clippers. Try to remove about 3 – 5 coils first, to see the difference.
The second option is to replace the factory springs with tighter aftermarket springs. Ensure that you get the right size to make sure they are compatible with your clutch.
Step 4 – Rebuild Your Clutch
Next, rebuild your go-kart clutch by assembling the parts back together in the reverse order you have taken it apart. Before reassembling your clutch, ensure that all of the internal parts are functioning.
While you’re at it, you may also want to oil your go-kart clutch.
Step 5 – Reattach Your Clutch
Lastly, you can reattach your clutch to the crankshaft and mount back the bolt and washer. Tighten the set screw and ensure that the clutch is secured and firmly in place. You may also want to check out the guide on how to install a go-kart clutch.
Reconnect the chain onto the crankshaft and clip the master link in place. Make sure to test drive your go-kart safely. You should notice an improvement in performance, less slippage and a better throttle response.